Be Unstoppable!

It's a (belated) #FoodieFriday post! Which means I gotta share something delicious and nutritious. So why not stay on the Shakeology train? Haha

A couple posts ago, I told you all about Shakeology and why I'm obsessed with it in "What is Shakeology? AND How is it different?". So, it only seems appropriate that I would do a Shakeology recipe share!

In that last post I told you all about the health benefits of shakeology and why it is beneficial to you from a health standpoint, and worth the cost you pay (which let's be real, is only the price of a latte! Prioritize!)

Today, I'm going to get into the fun part, and my favorite thing about Shakeology - the taste!

Shakeology comes in 4 different flavors - Chocolate, Vanilla, Strawberry and Greenberry! Though I definitely have my personal preferences, I've tried them all and they're ALL really tasty on their own with just some water/milk and ice!

But today, I want to share with you how we can get a little crazy with our Shakeology recipes, and have a whole lot of fun!

So let's go...flavor by flavor!

Probably my first Shakeology selfie for my challenge group! Enjoying the Supa Tropical!
Greenberry!

The absolute first Shakeology flavor I tried!! I don't know what inspired me. Maybe I just wanted to get a little crazy! Or probably because it was the flavor my coach was drinking when I signed up!

It's delicious! It tastes like a green tea frappucino in my opinion! Nom!

Greenberry definitely isn't for everyone, but I definitely have some AWESOME recipes that you should try!

Greenberry Coffee Kickstart
-1C of drip Coffee (at whatever strength you desire)-1/2 C of nut milk (I like Almond and coconut milk)-Handful of chopped spinach (You can use other greens if you wish, but I like spinach because it's softer and it blends well)-1 scoop of Greenberry Shakeology-1 tsp of PB2 powdered peanut butter-7-8 large ice cubesBlend and Enjoy!

Supa Tropical! ShakeO
-1C of almond/coconut blend
-1C of water
-1C of frozen mixed fruit (mine contained mangos, strawberries, pineapple and grapes)
-1 scoop of Greenberry Shakeology

FAVORITE! Or at least one of them! This CHAI TEA LATTE SHAKEOLOGY is a winner!
Vanilla!
Vanilla is an awesome shakeology flavor to start with! It's super versatile and really yummy! I have a ton of fun jazzing it up!

Here are some of my Vanilla absolute favorites!

**For a lot of these I make tea or some other hot drink. What I will usually do is I will heat the water and let the tea steep and then cool make down during the time that I'm working out! That way the tea is nice and strong and has cooled before I mix it into my Shakeology!**

Pumpkin Spice Latte Shakeology:
-12 oz of STRONG Pumpkin Spice tea-**Optional coffee if desired - I don't think this one needs it**-4-8 oz of almond milk-Scoop of VANILLA Shakeology
-4-8 oz of almond milk
-Scoop of VANILLA Shakeology
-Ice (as much as preferred) and blend

Chai Tea Latte Shakeology**One of my absolute favorites!!**
-12 oz of STRONG Chai Tea
-**Optional coffee if desired - I don't think this one needs it**
-4-8 oz of almond milk
-Scoop of VANILLA Shakeology
-4 ice cubes (or ice to taste)
BLEND AND ENJOY!!

Apple Pie Shakeology
-1C Apple Cider (make hot and let cool)
-1C Almond Milk
-1 scoop Vanilla Shakeology
-Couple shakes of Cinnamon
-4 ice cubes (or ice to taste)
BLEND AND ENJOY THE DELICIOUSNESS

Strawberry Cheesecake Shakeology
-1/2C  almond milk
-1C water
-1 purple 21 day fix container of frozen strawberries (or just frozen berries if you're going for Berry Cheesecake)
-1 read 21 day fix container of greek yogurt
-1 scoop Vanilla Shakeology
- Ice if desired
BLEND AND ENJOYE!

Just a little recipe collage with some of my favorite recipes!
CHOCOLATE!
Oh chocolate chocolate chocolate....yummmmmmmmm

I'm telling you right now, I might be a little bit biased on this one. I'm a chocolate girl. I spend most of my time swapping between chocolate and vanilla because I love the versatility. But in my heart, I'll always be a chocolate lover. And these recipes are SUCH amazing treats! I legitimately feel like I'm cheating on my nutrition when I have one! They're THAT GOOD!

Peppermint Mocha Shakeology: **FAVORITE**
-1C STRONG Peppermint Tea
-1C almond milk or drip coffee (cooled) or both half and half
-1 scoop Chocolate Shakeology
-Ice to taste
BLEND!

Cinnamon Roll Shakeology: **FAVORITE**
-1C water
-1C Almond mlk
-1 scoop Chocolate Shakeology
-A little Vanilla extract
-Couple shakes of cinnamon
-Ice to taste
BLEND!

PB&J Shakeology:
-1C Almond Milk (chocolate if you have it...if not no biggie)
-1C water
-handful of frozen berries
-2T of PB2
-1 scoop shakeology
BLEND & ENJOY!

Mocha Frappuccino ShakeO:
-0.75C Almond Milk (or Almond-Coconut Milk Blend)
-1C Brewed Coffee (refrigerated or cooled)
-1 scoop Chocolate Shakeology
-Half a frozen banana **Optional, but does add a great creaminess to your smoothie**
-1tsp of PB2 powdered peanut butter
-Ice to taste
BLEND!

Chocolate Banana ShakeO
-1-2C Almond Milk or WATER
-1 scoop chocolate shakeology
-1/2-1 whole frozen banana
-1T PB2
-Ice to taste
BLEND!

 These all are delicious!! I hope you enjoy them!


Strawberry!
Similarly to greenberry, I found this one to be less versatile but still delicious! I don't have as many recipes with this one, but that's definitely not to say it's not yummy!

Berry Delicious ShakeO:
-1.5C of almond milk
-Handful of chopped greens
-1 scoop of Strawberry Shakeology
-a handful of frozen mixed berries - add more of these for a thicker, fruitier shake
-2-3 large ice cubes
Blend and Enjoy!

Tropical Strawberry ShakeO:
-1-2C of almond milk or WATER
-1 scoop Strawberry Shakeology
-1 frozen banana
-Ice to taste
BLEND! and Enjoy the simple yumminess!


I hope you got some fun recipes out of this! I have a blast making and thinking up NEW shakeology recipes! What's your favorite? If you've got a good one that I just HAVE to try, post below! I would love to check it out!

Have an awesome day!


How have I not published this??? I'm freaking out right now!!

I legitimately thought that I had posted this recipe a LONG time ago, but without as many awesome pictures...only to realize that I have not! This is a food emergency right now, because you all need to try this recipe!!

Okay, hold on...let me compose myself...

So, I pretty much gave you the run down of my vacation home in my last post, Home for the Holidays, where I emphasized the things that I did while I was home to ensure that I was at least maintaining my healthy habits! At the end of that post, I started talking about the fact that something you can do for your family while your home to help yourself stay healthy, help your family get introduced to your lifestyle, and also to take some of the workload off of your family in terms of making dinner! I kind of teased you about a recipe that I made for them...and now I'm going to lay it all out for you...

Introducing...one of my absolute favorite recipes that I've ever made...

I originally got this recipe from Pinch of Yum, and have since modified it by a) adding protein, and b) increased the amount of food with more squash and lots of tortillas!!

But here's the jist....

What you'll need...
  • 1 small onion, chopped
  • 1 jalapeño, chopped, seeds and ribs removed
  • 2 bell peppers, chopped
  • 2 tablespoons of butter
  • 1 small butternut squash, cubed
  • ½ teaspoon chili powder, or more if you prefer spicier
  • ½ teaspoon cumin, or more if you prefer spicier
  • ½ teaspoon salt
  • 3 chicken breasts, cubed
  • 16 ounces of fresh mushrooms, chopped
  • Corn tortillas, I used 2 10 tortilla packages of the small corn tortillas
  • 2 cups shredded Mexican mix cheese
  • Cilantro
  • 16 ounces Tomatillo sauce (The original recipe called for homemade tomatillo sauce, but I'm all about simplifying so I bought it at the store)
Directions...

Squash Filling
The squash and pepper part of the filling is so beautiful! And - your house will probably smell good by this point! AT this time, aunts and uncle arrived and my Aunt Lesa was gushing about how good this all smelled
  • Over high heat, roast the peppers and jalapeño until just brown
  • Add the onions and saute until translucent
  • Add the squash, 1 T of butter, cumin, chili powder, and salt...and saute until the squash is tender by pricking with a knife. This may take a bit of time depending on the size of cubes you cut your squash into so plan accordingly with time.
  • Once the squash is cooked set this mixture aside
At this time you may want to start pre-heating your oven to 400 degrees.

Mushroom Filling
Chicken and Mushroom part of the filling 
  • Add a tablespoon of butter to the plan.
  • At this time, add the cubed chicken breast and cook chicken through until almost fully cooked.
  • Add the mushrooms and saute until softened and slightly brown
  • Season with salt and additional chili powder if desired
Assembly and Cooking
The prep takes longer than all the actual cooking - only approximately 15 minutes until DELICIOUSNESS!
  • Wrap the tortillas (about 5 or 6 at a time) in moist paper towels and zap in the microwave for 1-2 minutes. This is to make the tortillas soft and pliable so that they don't break during the assembly process. Seriously don't skip this step! Also be careful with the tortillas because they'll likely be hot when you handle them!
  • Combine the squash, mushroom & chicken mixes.
  • Fill the tortillas with the mixture and close, placing them seam side down in the pan.
  • Repeat until you've used all the tortillas. You may have some filling leftover. If you do, just sprinkle it over the top of the tortillas. For me, I was able to make two 9x13 dishes full of tortillas and I split the leftover filling between the two platters.
  • Top the dishes with tomatillo sauce and cheese, spreading evenly between the two dishes!
  • Bake for 15-18 minutes until cheese is melted and bubbly!
  • Top with cilantro and serve!
I had planned on making this recipe my very last night home for my holiday vacation. It was supposed to just be myself and my parents, but I knew it would be a LOT of food, so I invited my aunts and uncle, and my grandparents over! We even had a surprise visit from my family friend!  So, altogether, I was able to serve 9 people with very hearty appetites with this and had a little bit leftover! And let me tell you, it was a HIT! Can't you tell?
They busted into the first pan before I could even take a picture, and before I knew it BOTH pans were gone!
My grandma brought over a Chinese cabbage salad, which went surprisingly well with the enchiladas! Let me know if you want that recipe too! It's a family favorite!

Anyways, my family really really really enjoyed this recipe and I hope yours does too! :-)

Happy cooking!


Do you have foods that are just like your go-to? When you're busy or stressed or want something that's healthy, easy, and won't break the bank? This is mine!

Quinoa Mac N' Cheese!!

I'm sure I found the inspiration for this somewhere on pinterest, but I have literally been making this for so long now that I don't remember!  
I'm a huge fan of recipes that include all of my main food groups all wrapped up in one, and this one does that in spades! 

You've got your veggies - a mixture of yellow squash, zucchini, and red pepper.
You've got your protein - roasted chicken, chunked and shredded.  
You've got your fats/oils - shredded cheddar cheese.
And you've got your grain - Quinoa! The freaking superman of grains!

Quinoa is probably one of the best grains you can incorporate into your diets! It's so nutrient rich!! Just to provide you with a snap shot...
Here is the nutrient breakdown for 1 C of cooked quinoa...
  • 8 grams of protein
  • 5 grams of fiber
  • 58% of the RDA for Manganese (on of your essential nutrients)
  • 30% of the RDA for Magnesium (essential nutrient)
  • 28% of the RDA for Phosphorus (essential nutrient)
  • 19% of the RDA for Folate (you get the idea...E.N.)
  • 18% of the RDA for Copper
  • 15 for Iron
  • 13% for Zinc
  • 9% for Potassium
  • Over 10% for Vitamins B1, B2, and B6
  • Small amounts of Calcium, B3 (Niacin), and Vitamin E
Also, Quinoa contains molecules that have been shown to have anti-inflammatory, anti-viral, anti-cancer, and anti-depressant effects.
Quinoa is super high in fiber, way more than other grains.
It's gluten-free.

It's high in protein, and BONUS, contains all of the essential amino acids (the building blocks of proteins) that we need to survive!

And that's just some of the awesome benefits! Check out more on Authority Nutrition!
So, now that I've blabbed about all the awesome reasons you should love quinoa, let's get to the recipe, shall we?
Grocery List:
  • Quinoa - $5 (approximately - I bought a bit in bulk bag a while ago)
  • 2 medium zucchini - $3.20
  • 1 yellow squash - $1.59
  • 1 red pepper - $1.29
  • 3 cups of roasted chicken - I just bought one of those pre-roasted chickens and shredded the chicken off of the bone $8.99
Things I already had:
  • PAM!
Total = $20.07 total for recipe...And you'll have leftover chicken and quinoa for other dishes!

Directions...
Basically, this is probably the easiest thing I've yet to post about! So, let's get started.
  • Grease a pan with PAM, and cut up your zucchini, yellow squash, and red peppers.
  • Sautee the vegetables in the pan over medium to medium-high heat until soft...about 5-8 minutes.
  • Meanwhile, cook your quinoa per package instructions. I made enough for 2 cups of cooked quinoa.
  • Combine veggies and quinoa together in a bowl, and then add your cooked, shredded, chicken.  
  • When you're ready to eat, portion about 1/4 or so of the mixture into a bowl.
  • Top with shredded cheese and mix in. If fresh, let the cheese get all melty and blended into the veggies and quinoa. If not, zap it in the microwave for a minute or so!
  • Then, ENJOY!
This recipe is seriously a fave of mine! I hope you enjoy it! 


30 Quick Easy Meals - Rachel's newest cookbook that we collaborated on in generating the idea!  The recipes? All Rachel!
How often do you find yourself trolling pinterest looking for recipes but all of them are so labor intensive OR they just take tons of time? All the time, right?

Admittedly, some of the recipes I've posted lately either take a long time between cooking and assembly, OR they're just labor intensive!

Well, to remedy that and to help you through all of those times when you really need a quick, delicious, healthy meal--I would like you introduce you to this cookbook--30 Quick Easy Meal By: Rachel Vdolek.

Rachel and I went to high school together! She was one of my good friends in high school and was part of a gang of people that I hung out with all the time. Well, as can only be expected, college and life pulled all us in that group of people apart.  Recently, I reconnected with Rachel on facebook. I knew that she had majored in Engineering in college and had worked in that field for an extended period of time. When I asked her about that I was pleasantly surprised to find that she had since moved away from the engineering field and was actually pursuing a completely different field! Food! She had been writing cookbooks, had an etsy shop of kitchen and DIY related projects, among other business endeavors to help her pursue her passion for food!
Smoked salmon, asparagus, and feta with a raspberry vinaigrette

So, I bought one of her early cookbooks--The Spring Kitchen. She's got cookbooks for all the different seasons to promote recipes featuring seasonal ingredients. This was one of her first cookbooks! And let me tell you...Engineering's loss is my stomachs gain! I mean, check out that salad above! Doesn't that look amazing!

Her recipes are delicious! And simple! Which as a busy graduate student I could totally appreciated. As I was working through (and thoroughly enjoying) through this cookbook, I noticed that it called for a lot fancier ingredients, so one day we started talking about ways to simplify...via facebook message of course (since we leave across the country from each other)...and she said...
Hmmm...maybe I will get your help on writing a cookbook for graduate students.
Needless to say, I freaked out a little bit...and the idea developed from there...
Or just busy people on a budget. Minimal prep/cook time and minimal ingredients. Nothing too fancy. Simple, healthy eating! Oh man I'm so inspired right now! Can we please do this?
And pretty much this thing just exploded from there. I sent her some ideas of what I was thinking...and she just ran with it!

From there...she generated this beautiful cookbook-- 30 Quick Easy Meals.

What does it contain? Deliciousness like...

  • Broccolini Bow-tie Pasta
  • Chicken & Corn Chowder
  • Beef Tacos
Just to name a few...

Delicious! Chicken & Corn Chowder from 30 Quick Easy Meals!
I highly recommend you check out this cookbook! The recipes are simply, delicious, and the cookbook is available in both kindle edition and hard copy. If you're strapped on cash, but interested, the kindle edition is SUPER CHEAP! $3.99!

So, check this out! It's a great cookbook that caters to those of us with busy lifestyles, who need to keep things straightforward and simple!

And also, if you feel so inclined, check out Rachel's blog - Rachel's Kitchen - which can be found here: http://rachelvdolekkitchen.blogspot.com/! She's got tons of GREAT recipes with a focus on Pacific Northwest ingredients, all of which are Dairy and Egg Free!

Happy cooking!


I'm sorry! I know I've been MIA, particularly with my recipes lately! I'm going to focus a lot on remedying that! In fact, I have a new idea to give MOTW a face-lift!

Money is something that I know is a point of distress for a lot of graduate students, am I right? So, when I find a really great recipe or combination of recipes for the week that fall on or below my $50 a week shopping budget, you'll be the first to know!

So, this week I'm kicking off my budget MOTW with two great recipes!!

Now before I get to the recipes, I want to tell you about my shopping process. I have some go-to meals and snacks. In fact, the only thing that I really switch up during the week is my dinners!

Breakfast: Shakeology
AM Snack: Fruit (usually banana or an apple), sometimes I have greek yogurt too
Lunch: Kale salad with protein (hard boiled egg or chicken)
PM Snack: Veggies (Celery or Cucumbers) + Hummus
Dinner: Varies
**Optional after dinner snack: Greek yogurt**

So before I go to the store, I take stock of what I have.

For breakfast, do I have almond milk and coffee and tea to mix with my Shakeology?
For my snacks, do I have fruit? Do I have veggies and hummus?
For lunch, do I have my kale? Do I some sort of protein to mix in? Do I have oil and balsamic vinegar for my dress?
And for dinner, I pick out my recipes and build my grocery list around what I don't have for that recipe.

Then, it's off to the store!  Today, what I got at the grocery store was this!
  • Kale (2 bunches)
  • Celery (1 bunch)
  • Hummus (1 container Kroger private selections)
  • 1 lb lean ground turkey (93% lean)
  • Frozen mixed veggies (for both recipes) - 3 different kinds (peppers and onions; vegetable soup mix; mirepoix mix)
  • 28 oz crushed tomatoes, canned
  • 2 more zucchini (i already had one)
  • 15 oz fat free cottage cheese (slightly cheaper than ricotta)
  • 24 oz of skim mozzarella cheese
  • 1 lb of salmon chunks with skin (cheaper than salmon filets)
  • Curry powder (recipe called for green curry paste, but I couldn't find it in the grocery store)
  • 1 gallon of Silk coconut milk
  • 1 box of minute brown rice
After all was said and done (and rung up) - my groceries totaled $38.06 after Kroger Club savings! That's less than $40 for a weeks worth of groceries!  

Now to the recipes!

Firstly, a recipe from my good friend Rachel's new cookbook, 30 Quick, Easy Meals which can be found on Amazon in both a hard copy and a kindle edition pdf! It's a GREAT cookbook, especially for people who are on a budget AND are short on time!  So, today, from that cookbook I will be cooking Curried Salmon over Rice!

What you need:

  • Salmon
  • Frozen veggies
  • Curry powder (or curry paste if you can find it)
  • At least 14 oz of coconut milk
  • Brown rice

Basically, these recipe was so delicious and so easy to make! I was surprised! I've never made curry anything before. In fact, I've never even eaten curry before. But everything in this just sounded so great.  Basically, here's the gist...

  1.  The recipe called for a salmon fillet, but as I mentioned above, buying the salmon chunks was cheaper! I sauteed these skin-side down for about a minute. They should still be pretty raw.  
  2. Take the skin off of the salmon pieces and break them into bite-sized chunks
  3. Mix your salmon and frozen veggies (I used mainly the the peppers & onions and the mirepoix mix) with curry powder.  
  4. Add coconut milk and let simmer until the sauce thickens. 
  5. Cook the rice while curry is simmering.  
  6. When it's the thickness you want, you're done! Ladle some curry mix over your rice and you're good to go!
This recipe was delicious! And it's just a teaser of all the delicious, quick recipes that are found in Rachel's cookbook! I HIGHLY suggest you check it out here!

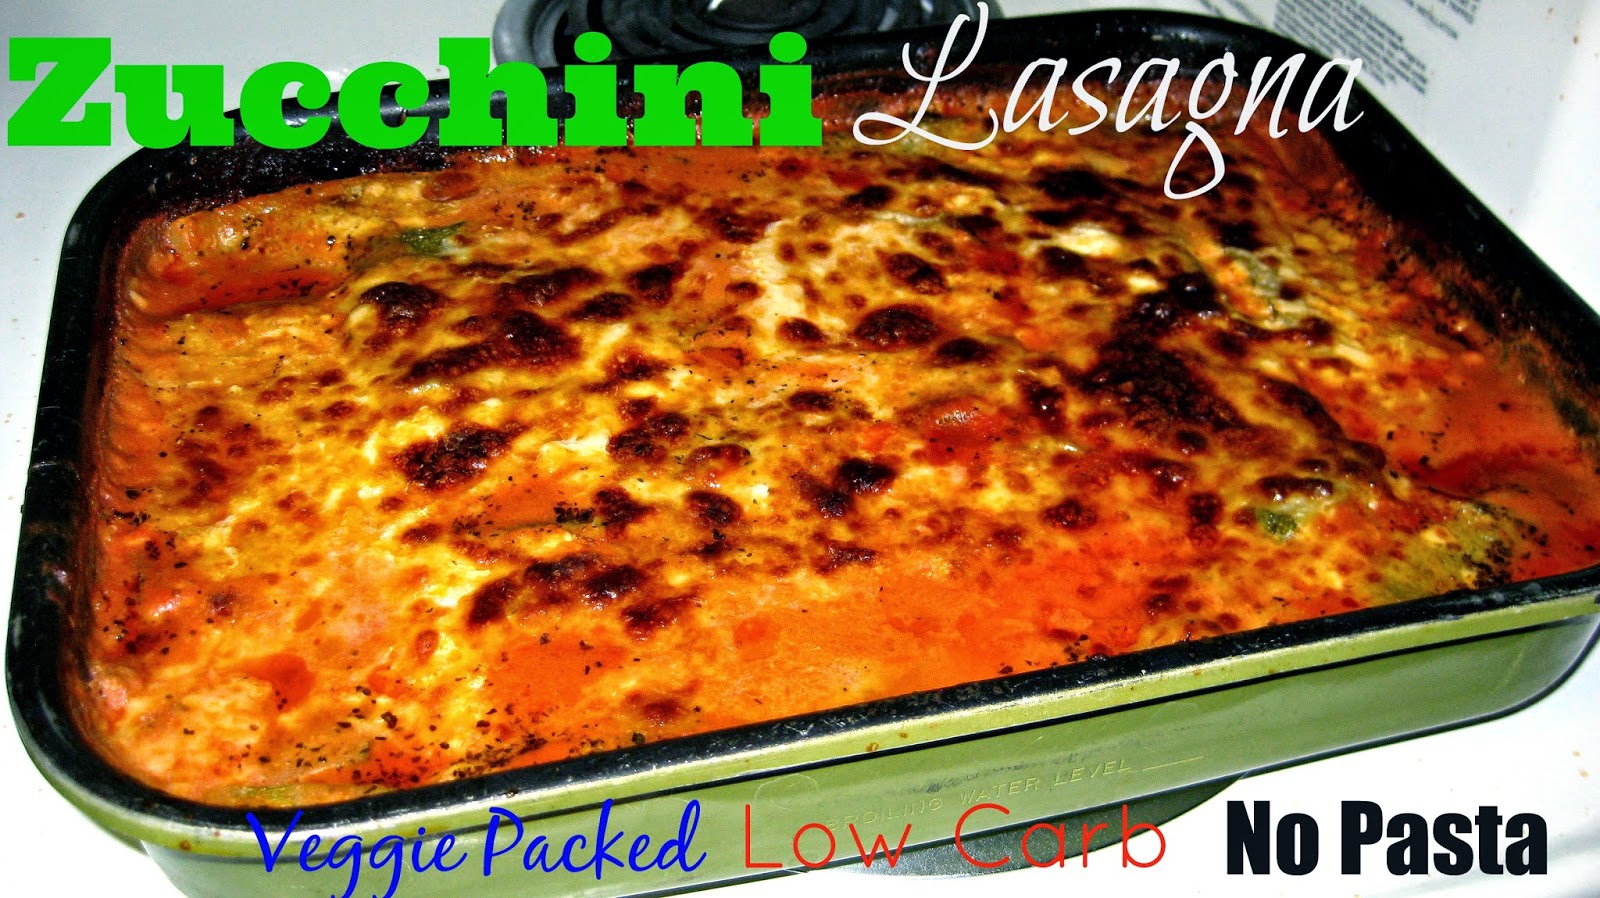
Secondly, we've got a recipe that has become a favorite in my challenge groups--ZUCCHINI LASAGNA! For my fellow Italian peeps, this is a GREAT way for you to get your pasta fix without all the carbs associated with pasta dishes!  This is a recipe that I adapted from Skinny Taste's Zucchini Lasagna Recipe.

Now, fair-warning, this recipe is a bit labor intensive. But, I'm telling you, the taste is SO worth it!

What you need:

  • Ground turkey
  • Frozen veggies (or fresh) *optional for meat sauce*
  • Herbs and seasonings for sauce *optional*
  • Crushed tomatoes (28 oz)
  • 3-4 Zucchini
  • Salt (for zucchini preparation)
  • 15 oz cottage cheese or ricotta 
  • Parmesan cheese
  • Mozzarella cheese (for sprinkling between layers and on top)
Firstly, I tackled the sauce! This is a great thing to start with because it's going to simmer while you prep the other components.  

Basically, the great thing about meat sauces is that you can put whatever you want in it!  Meat sauces are super flexible like that! You want beef? Great. Peppers? Great. Hate peppers and want tons of garlic and onions? Awesome. Corn? That's great too!

Start by sauteing the ground turkey until there's no more pink. I ladled out the majority of the fat, but left a little bit in there for sauteing the rest of the veggies.

Then mix in your frozen veggies. Whichever ones you'd like! I stuck with the pepper & onion mix, as well as the mirepoix mix that I used in the last recipe.  I then added the crushed tomatoes, basil and italian seasoning to taste, as well as a bit of sugar to bring out the natural sweetness of the tomatoes. Let simmer for at least 20 minutes so all the flavors meld together. 

Now onto the zucchini...

Prepping the zucchini is by far the most labor intensive part of this process. You're probably think, why the heck would that be? Don't you just need to slice into strips and go?

Well, actually, no. Zucchini are very watery veggies. And, what we need to do is dry them out as much as possible or else you're lasagna is going to be more like soup than lasagna.   

So, after you've sliced everything into strips (and they don't have to be perfect...as you can tell mine aren't)...salt them! Salt will help bring out the juices, which you can then dab off.  Salt them and let them sit for at least 10 minutes.  Blot off any excess water.

Then, grill them, again blotting off the excess water after they've been grilled.

While you're zucchini are grilling - make your cottage cheese mixture by combining the 15oz of  cottage cheese with your parmesan cheese.  Set aside for assembly...

Now, you can assemble your lasagna!  During this time, I also preheated my oven to 375F.

Basically, this part is super easy! Kind of messy, but definitely easy! 

Start with your meat sauce on the bottom of the pan.
Layer zucchini on top of that.
Then your cottage cheese mixture.
Sprinkle with some of your mozzarella cheese.
Then layer some more zucchini.

Repeat this process until you run out of ingredients, and then top with mozzarella cheese!

I don't really think that pan size matters for the lasagna. Basically, if you want really thick lasagna, use a smaller pan. And a larger pan if you want your lasagna to have less layers.

After you've assembled your lasagna...bake covered for 45 minutes. Do not forget to cover! I totally did at first and it will save you some mess if you remember to cover your lasagna now!

After the 45 minutes have elapsed, uncover your lasagna and continue baking for 10-15 minutes or until golden brown on top.  

After baking, if you have the patience to wait and not dig in immediately, let your lasagna rest for 10 minutes. It will hold its shape better when you cut into it.  


While I was waiting for my lasagna too cook, I tackled some other miscellaneous meal prepping tasks.  This is a great time for that!

So, what did I do?

Ripped up kale for my kale salads
Chopped celery for my afternoon veggies and hummus
Hard boiled eggs for my lunch salad protein
Cooked and diced up a chicken breast for salad protein.

All my meals are essentially ready to be eaten! All I have to do is some assembly!  Super easy!

And now, I'm done for the day!  I'm sitting on my couch watching Harry Potter...haha.

Happy Meal Prep Sunday!


I'm very excited to announce that my blog has moved!

You will be automatically redirected to the new address.

If that does not occur, please visit https://thefitnerd.squarespace.com/'.